Creating trades - An Example
First, select the account you want to allocate the new position to.
Go to the "Account" section of the "Home" tab on the ONE Ribbon:

The currently selected Account is "Test Account". To change the Account click on the dropdown symbol to the right of the Account name:

and select the required Account by clicking on it with the mouse:

And thus we have now set the Account to "Think or Swim Trade Account". All trades subsequently created will be added to this account.
Next, select the underlying symbol from the dropdown list of available symbols or type the symbol code directly into the box. Clicking on the dropdown to the right of the Underlying symbol shows available Underlying's, from which the required Underlying can be selected:

The title of the underlying will change and the daily pricing information will be loaded, along with the current Implied Volatility, Implied Volatility change and Standard Deviation move from the close of the previous trading session. Any Standard Deviation moves greater than +1 will be highlighted in green (as in the example below), and greater than -1 will be highlighted in red.
For example:

Then, select the trading date on which the position will be opened. You can use various methods to select a trading date:-
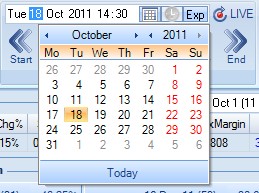
•Click on the calendar dropdown to display the calendar view and select a date from there.
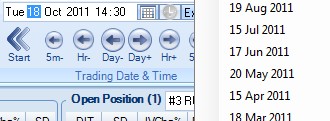
•Click the button labelled "Exp" to show all available expiration dates for the underlying and click on a date to select it (this is useful if you are back testing a strategy over a series of expiration cycles).
•Simply use the left and right arrows to move the date backward and forward respectively.
•Press F1 or F2 keys to trigger the left and right arrows (this is useful if you have double clicked the ribbon to minimize it in order to increase the work area).
•Left mouse click on one of the price bars on the Price Chart.
For example use the left and right arrows to navigate through time:

Or use the dropdown calendar to select a date:
Or use the available expiration date using the "Exp" button:
In order to ensure that we are starting a new position rather than amending an existing position, make sure the Open Position drop down box is set to "Start New Trade". Use the dropdown at the top right corner of the Open Position area:

and select "Start New Trade":

This will create a new position in which to place all the trades. The number in brackets "Open Position (1)" means there are currently one open position for the selected underlying, account and date combination. This helps the user to manage multiple positions in the same underlying and account.
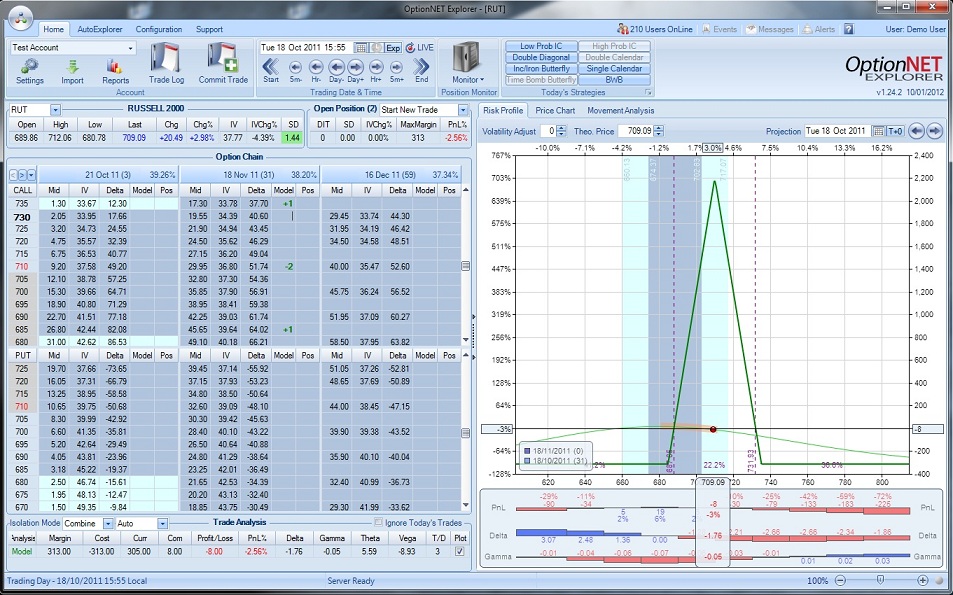
Enter the contracts for each leg in the Model column for the corresponding month and type. In the below example we've created a "RUT" +1/-2/+1 butterfly at the strikes 735/710/685 Calls in the November 2011 expiration month. Notice the strike 710 is highlighted in red to show where the most time premium resides. Also, the Call strike 730 is highlighted in bold showing where the cursor position is.
The days to expiration are displayed in parenthesis to the right of the expiration dates for each month, and to the right of that are the respective ATM volatilities for each month.
The cells of the option chain grids themselves are colored with one standard deviation price range to expiration being dark blue and two standard deviations light blue.
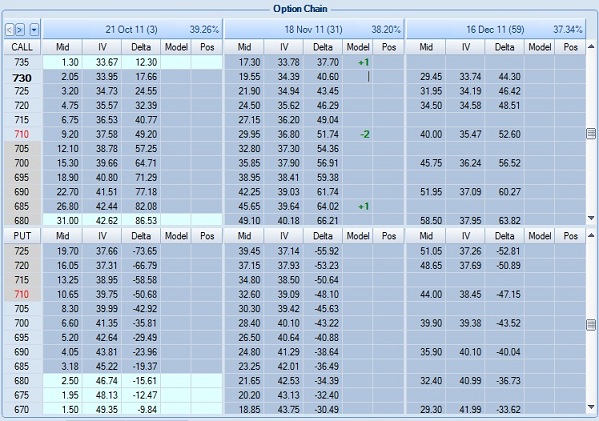
The modelled position values are displayed below the option chain in the Trade Analysis section. Adjust your position until it satisfies your objectives:

Once you are happy with the position, click on the "Commit Trade" button:

and the Trade Documentation window will popup:
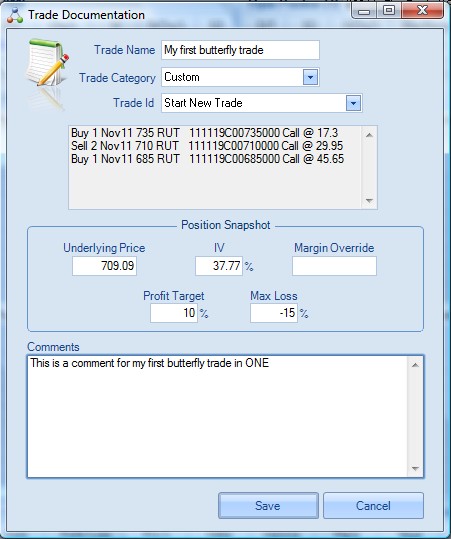
Enter a descriptive trade name, select the trade category, leave the trade id set to "Start New Trade" (if this trade was an adjustment to an existing open or closed Position, you would specify which Position to adjust here). You can enter your own information in the Position Snapshot or accept the default values. A position snapshot is stored for every trade and records specific key market information, along with your profit target and max loss parameters for the trade.
Note in particular the Margin Override field - if you do not want to use the margin values calculated by ONE enter a margin here and ONE will use that value instead for the Position creation or adjustment.
It is also recommended that you enter a comment describing the reasons why you made the trade. This is stored and acts as a detailed trading journal for analysis at a later date.
Click the Save button and the trade will be committed.
You will notice that the contracts for the trading legs move over to the Position column in the option chain. The comments can be displayed on the risk chart as a reminder of the reasons for the current trade:
Congratulations - you've just made your first of many trades in OptionNET Explorer.